 Hyundai Veloster: Front Strut Assembly. Repair procedures
Hyundai Veloster 2011-2017 Service Manual / Suspension System / Front Suspension System / Front Strut Assembly. Repair procedures
Hyundai Veloster: Front Strut Assembly. Repair procedures
Hyundai Veloster 2011-2017 Service Manual / Suspension System / Front Suspension System / Front Strut Assembly. Repair procedures
Hyundai Veloster 2011-2017 Service Manual / Suspension System / Front Suspension System / Front Strut Assembly. Repair procedures
Replacement
| 1. |
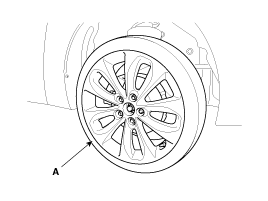
Remove the front wheel & tire.
|
| 2. |
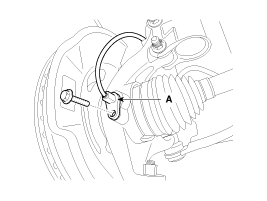
Remove the wheel speed sensor bracket(B) and wheel speed sensor
(A).
|
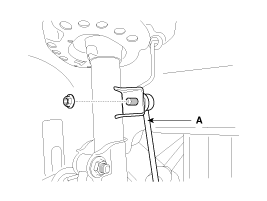
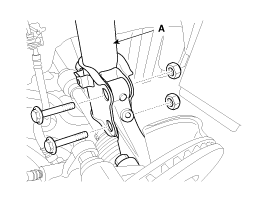
| 3. |
Disconnect the stabilizer link (B) with the front strut assembly
(A) after loosening the nut.
|
| 4. |
Loosen the strut mounting nut.
|
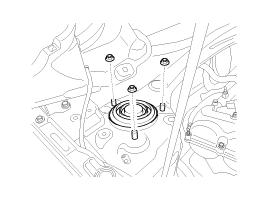
| 5. |
Disconnect the front strut assembly (A) with the front axle by
loosening the bolt & nut.
|
| 6. |
Installation is the reverse of removal.
|
Disassembly and Reassembly
| 1. |
Compress the coil spring (A) using SST(09546-26000). Do not compress
the spring more than necessary.
|
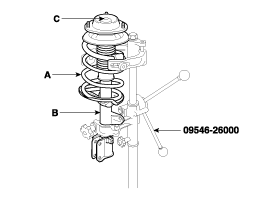
| 2. |
Loosen the lock nut (C) from the strut assembly (B).
|
| 3. |
Disassemble the components of front strut assembly in sequence.
(Refer to Front strut assembly components)
|
| 4. |
Reassembly is the reverse of disassembly.
|
Inspection
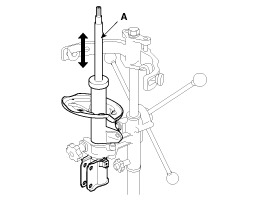
| 1. |
Check the components for damage or deformation.
|
| 2. |
Compress and extend the piston rod (A) and check that there is
no abnormal resistance or unusual sound during operation.
|
 Front Strut Assembly. Components and Components Location
Components
ãÂ
Tighten under unladen condition
ãÂ
...
 Front Lower Arm. Repair procedures
Replacement
1.
Remove the front wheel & tire.
Tightening torque :
88.3 ~ 107.9N.m(9.0 ~ 11.0kgf.m, 65.1 ~ 79.6lb-ft)
...
See also:
Specifications
Specifications
Model
D6GF1
Engine
Gasoline 1.6 GDI
Shift ratio
1st
3.615
2nd
1 ...
Closing the fuel filler lid
1. To install the cap, turn it clockwise until it ãclickã one time. This indicates
that the cap is securely tightened. 2. Close the fuel filler lid and push it in
lightly making sure that it i ...
AVN Remote Control. Repair procedures
Inspection
1.
Check the audio remote control switch (A) for resistance between
connector terminals in each switch position.
[LH-AUDIO]
[RH-TRIP]
...
Categories
- Hyundai Veloster Manuals Home
- Hyundai Veloster 2010-2017 Owner's Manual
- Hyundai Veloster 2010-2017 Service Manual

ôˋ 2011-2026 Copyright www.hvmanual.com