 Hyundai Veloster: Control Panel

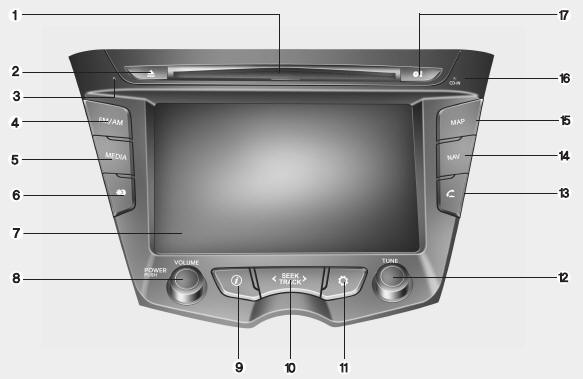
1. Disc slot
2. Eject ( )
)
Press to eject a disc
from the unit.
3. RESET hole
You can reset the unit when it doesn't operate normally. Press
the RESET hole with a sharp object.
4. FM/AM
Selects the FM/AM band.
5. MEDIA
Selects a source: CD, USB, iPod, BT, AUX.
6. Display on/off ( )
)
Press to switch
between the display on and off.
7. LCD
8. Left rotary (POWER/VOLUME)
- Press: Power on/off
- Turn: Volume control
9. Info ( )
)
Press to view the destination,
route, and traffic information when the route guidance is active.
• Destination:
Shows the information of current vehicle position and destination.
• Route: Shows
the route information from the current vehicle position to the destination.
•
Traffic: Shows the traffic information.
- Traffic info on route: The list of traffic
information found on the recommended route from the current vehicle position to
the destination is displayed.
- Traffic info nearby: The list of traffic information
around the current vehicle position is displayed.
10. <SEEK/TRACK> • Press this button.
- Automatic tuning: RADIO
- Track up/down:
USB CD iPod BT
• Press and hold this button.
- Search (FF/REW): USB CD iPod
BT
11. SETUP ( )
)
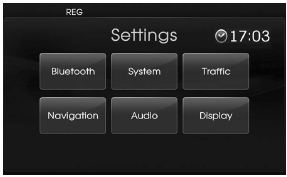
• Press to access
system settings.

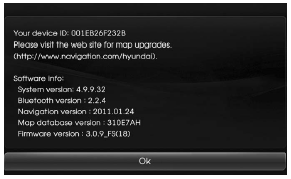
• Press and hold to check the device ID, the software version, the navigation version, and the map version. BT

12. Right rotary (TUNE)
Rotate it clockwise/counterclockwise.
• Searches the previous or next radio
frequency.
- Manual tuning
• Skips a track/file up/down in all list screen.
• ZOOM IN/ ZOOM OUT
- Rotate to change the map scale on the map screen.
Repeat
voice guidance
Press to repeat the voice guidance.
13. PHONE ( )
)
Use to enable Bluetooth Hands-Free Phone.
14. NAV
Press to enter a destination menu.
Various methods for entering a destination
are available.
15. MAP
Press to display the current location map screen.
16. CD indicator light (CD-IN)
When a disc is inserted, the indicator is illuminated.
17. Clock ( )
)
• Press to display the digital/analog clock and outside temperature in power
on/off status.
• Press and hold to move to the [Clock] menu.
 Care of disc
If the temperature inside the car is too high, open the car windows for
ventilation before using your car audio.
It is illegal to copy and use MP3/WMA files without permission. Use CDs
that ...
See also:
Rear Seat. Components and
Components Location
Components
1. Headrest [RH]
2. Headrest guide [RH]
3. Rear seat back cover [RH]
4. Rear seat cushion cover [RH]
5. Cup holder panel assembly
6. Headrest [LH]
7. H ...
Road warning
Hazard warning flasher
The hazard warning flasher serves as a warning to other drivers to exercise extreme
caution when approaching, overtaking, or passing your vehicle.
It should be used whenev ...
Clutch Pedal. Repair procedures
Inspection
Clutch Pedal Inspection
1.
Measure the clutch pedal height (from the face of the pedal pad
to the floor board) and the clutch pedal clevis pin pla ...
Categories
- Hyundai Veloster Manuals Home
- Hyundai Veloster 2010-2017 Owner's Manual
- Hyundai Veloster 2010-2017 Service Manual

