 Hyundai Veloster: Rear Repair procedures
Hyundai Veloster 2011-2017 Service Manual / Body (Interior and Exterior) / Seat Belt / Rear Repair procedures
Hyundai Veloster 2011-2017 Service Manual / Body (Interior and Exterior) / Seat Belt / Rear Repair procedures
Replacement
Rear Seat Belt Replacement
|
| 1. |
Remove the following items first :
|
| 2. |
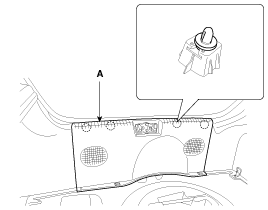
Using a screwdriver or remover, remove the rear transverse
trim (A).
|
| 3. |
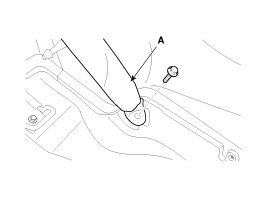
After loosening the mounting bolt, then remove the
rear seat belt lower anchor (A).
[LH, RH]
|
| 4. |
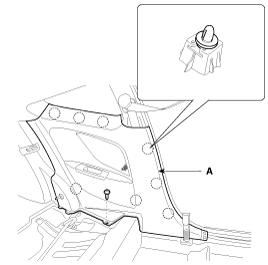
Using a screwdriver or remover, remove the center
pillar lower trim (A).
[LH]
|
| 5. |
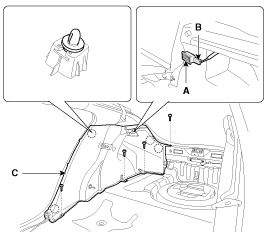
Using a screwdriver or remover, remove the luggage
side trim lamp (A).
|
| 6. |
Disconnect the luggage side trim lamp connector (B).
|
| 7. |
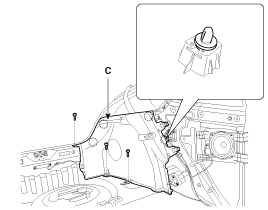
After loosening the mounting screws, then remove
the luggage side trim (C).
[LH]
[RH]
|
| 8. |
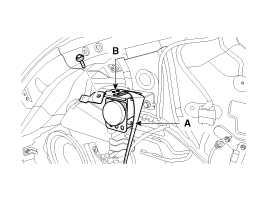
After loosening the mounting bolt, then remove the
rear seat belt (A) and rear seat belt retractor (B).
|
| 9. |
Installation is the reverse of removal.
|
Rear Seat Belt Buckle Replacement
| 1. |
Remove the following items first :
|
| 2. |
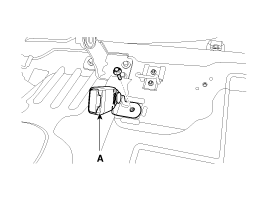
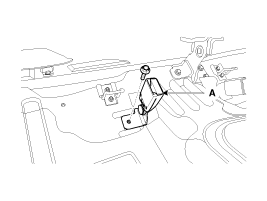
After loosening the mounting bolt, then remove the
rear seat belt buckle (A).
[LH]
[RH]
|
| 3. |
Installation is the reverse of removal.
|

