 Hyundai Veloster: Rear Seat. Repair procedures
Hyundai Veloster 2011-2017 Service Manual / Body (Interior and Exterior) / Seat & Power Seat / Rear Seat. Repair procedures
Hyundai Veloster 2011-2017 Service Manual / Body (Interior and Exterior) / Seat & Power Seat / Rear Seat. Repair procedures
Replacement
Rear Seat Assembly Replacement
| 1. |
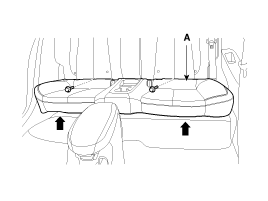
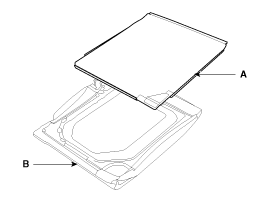
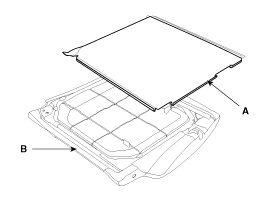
After loosening the mounting bolts, then remove the
rear seat cushion (A).
|
| 2. |
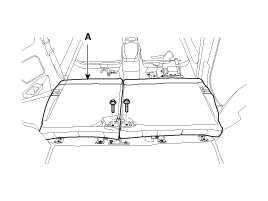
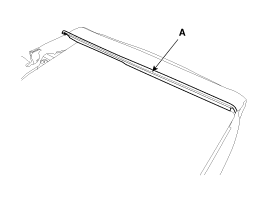
After loosening the mounting bolts, then remove the
rear seat back (A).
|
| 3. |
Installation is the reverse of removal.
|
Seat Back Cover Replacement [LH]
|
| 1. |
Remove rear seat back assembly.
|
| 2. |
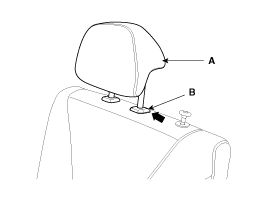
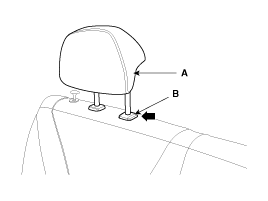
Push the lock pin (B), remove the headrest (A).
|
| 3. |
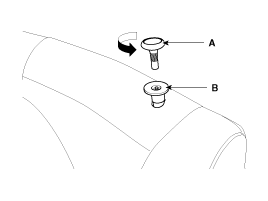
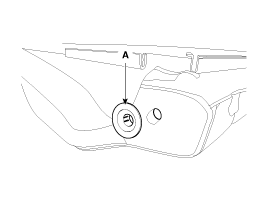
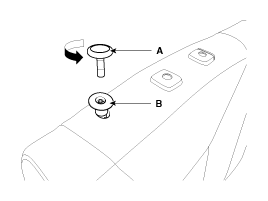
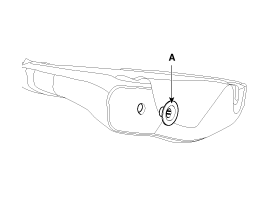
Remove the rear seat folding lever (A) after turning
in the counter clock-wise direction.
|
| 4. |
Remove the rear seat folding lever cover (B).
|
| 5. |
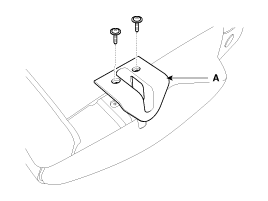
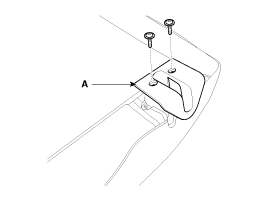
After loosening the mounting screws, then remove
the rear seat latch cover (A).
|
| 6. |
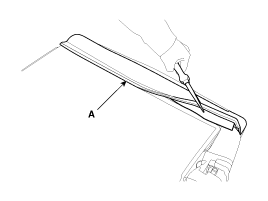
Using a screwdriver or remover, remove the rear seat
side bracket cover (A).
|
| 7. |
Push the protecter (B) by the rear seat back panel
(A).
|
| 8. |
Using a screwdriver or remover, remove the rear seat
back panel (A).
|
| 9. |
Disconnect the protector (A).
|
| 10. |
Remove the rear seat back panel (A) from the rear
seat back frame (B).
|
| 11. |
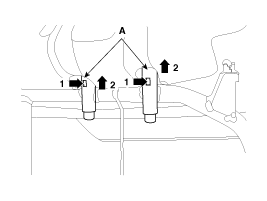
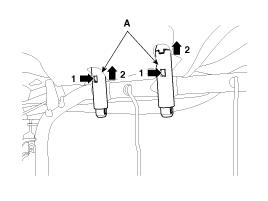
Pull out the headrest guides (A) while pinching the
end of the guides, and remove them.
|
| 12. |
Remove the rear seat back cover from the rear seat
back frame.
|
| 13. |
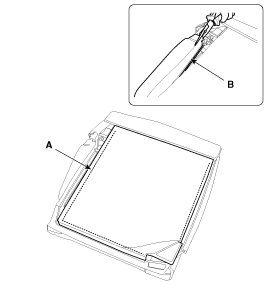
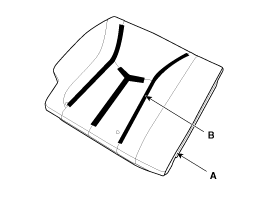
After removing the velcro tape (B) on the rear of
seat back and remove the seat back cover (A).
|
| 14. |
Installation is the reverse of removal.
|
Rear Seat Latch Replacement [LH]
|
| 1. |
Remove the following items first.
|
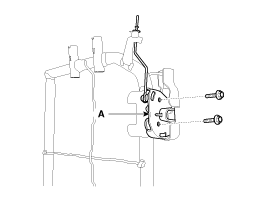
| 2. |
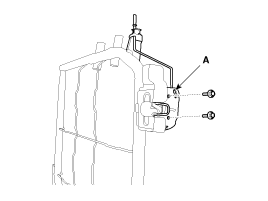
After loosening the mounting bolts, then remove the
rear seat latch assembly (A).
|
| 3. |
Installation is the reverse of removal.
|
Seat Back Cover Replacement [RH]
|
| 1. |
Remove rear seat back assembly.
|
| 2. |
Push the lock pin (B), remove the headrest (A).
|
| 3. |
Remove the rear seat folding lever (A) after turning
in the counter clock-wise direction.
|
| 4. |
Remove the rear seat folding lever cover (B).
|
| 5. |
After loosening the mounting screws, then remove
the rear seat latch cover (A).
|
| 6. |
Using a screwdriver or remover, remove the rear seat
side bracket cover (A).
|
| 7. |
Push the protecter (B) by the rear seat back panel
(A).
|
| 8. |
Using a screwdriver or remover, remove the rear seat
back panel (A).
|
| 9. |
Disconnect the protector (A).
|
| 10. |
Remove the rear seat back panel (A) from the rear
seat back frame (B).
|
| 11. |
Pull out the headrest guides (A) while pinching the
end of the guides, and remove them.
|
| 12. |
Remove the rear seat back cover from the rear seat
back frame.
|
| 13. |
After removing the velcro tape (B) on the rear of
seat back and remove the seat back cover (A).
|
| 14. |
Installation is the reverse of removal.
|
Rear Seat Latch Replacement [RH]
|
| 1. |
Remove the following items first.
|
| 2. |
After loosening the mounting bolts, then remove the
rear seat latch assembly (A).
|
| 3. |
Installation is the reverse of removal.
|
Rear Seat Cushion Cover Replacement
|
| 1. |
Remove the following items first.
|
| 2. |
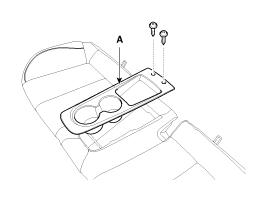
After loosening the mounting screws, then remove
the rear seat cup holder panel assembly (A).
|
| 3. |
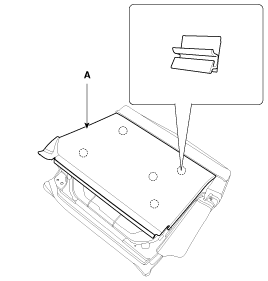
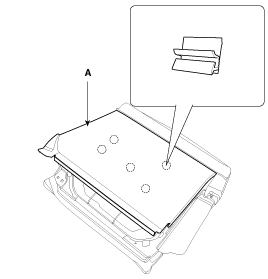
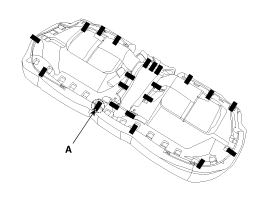
Remove the mounting clips (A).
|
| 4. |
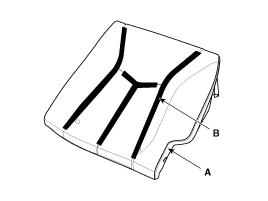
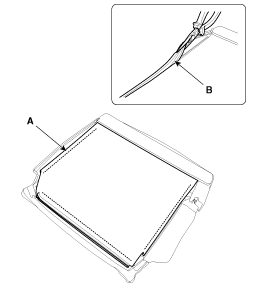
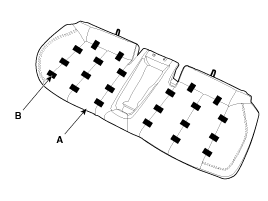
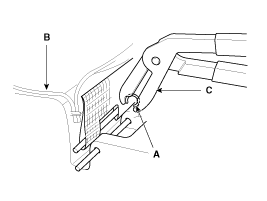
After removing the hog-ring clips (B) on the rear
of seat cushion and remove the seat cushion cover (A).
|
| 5. |
Installation is the reverse of removal.
|
 Rear Seat. Components and
Components Location
Components
1. Headrest [RH]
2. Headrest guide [RH]
3. Rear seat back cover [RH]
4. Rear seat cushion cover [RH]
5. Cup holder panel assembly
6. Headrest [LH]
7. H ...
 Seat Belt
...
See also:
Opening the trunk with the alarm armed (if equipped)
When the alarm is armed, the alarm will not sound if the trunk lid is opened
with the transmitter (or smart key).
Once the trunk is opened and then closed, the trunk will be locked automatically
...
Relay Box (Engine Compartment). Repair procedures
Inspection
Power Relay Test (Type A)
-
Do not use pliers.
-
...
Rear Torsion Beam Axle. Components and Components Location
Components
1. Rear torsion beam axle
...
Categories
- Hyundai Veloster Manuals Home
- Hyundai Veloster 2010-2017 Owner's Manual
- Hyundai Veloster 2010-2017 Service Manual
© 2011-2026 Copyright www.hvmanual.com

