 Hyundai Veloster: Hood. Repair procedures
Hyundai Veloster 2011-2017 Service Manual / Body (Interior and Exterior) / Exterior / Hood. Repair procedures
Hyundai Veloster 2011-2017 Service Manual / Body (Interior and Exterior) / Exterior / Hood. Repair procedures
Replacement
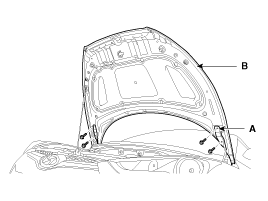
Hood Assembly Replacement
|
| 1. |
After loosening the hood hinge (A) mounting bolts,
and then remove the hood (B).
|
| 2. |
Installation is the reverse of removal.
|
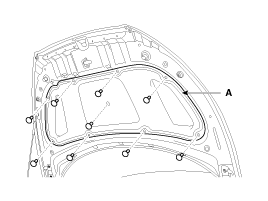
Hood Insulator Pad Replacement
| 1. |
Using a clip remover, detach the clips, and remove
the hood insulator pad (A).
|
| 2. |
Installation is the reverse of removal.
|
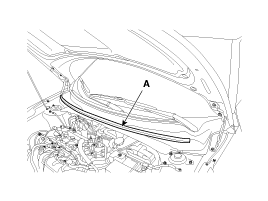
Hood Weatherstrip Replacement
| 1. |
Remove the hood weatherstrip (A).
|
| 2. |
Installation is the reverse of removal.
|
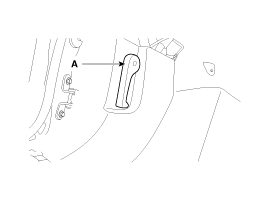
Hood Latch Release Handle Replacement
| 1. |
Using a screwdriver or remover, remove the hood latch
release handle (A).
|
| 2. |
Installation is the reverse of removal.
|
Hood Latch Replacement
| 1. |
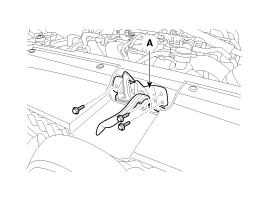
Remove the hood latch (A) mounting bolts.
|
| 2. |
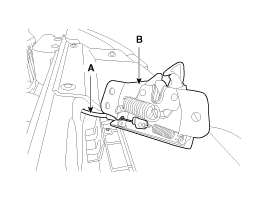
Disconnect the hood latch release handle cable (A)
and remove the hood latch (B).
|
| 3. |
Installation is the reverse of removal.
|
Adjustment
Hood Adjustment
| 1. |
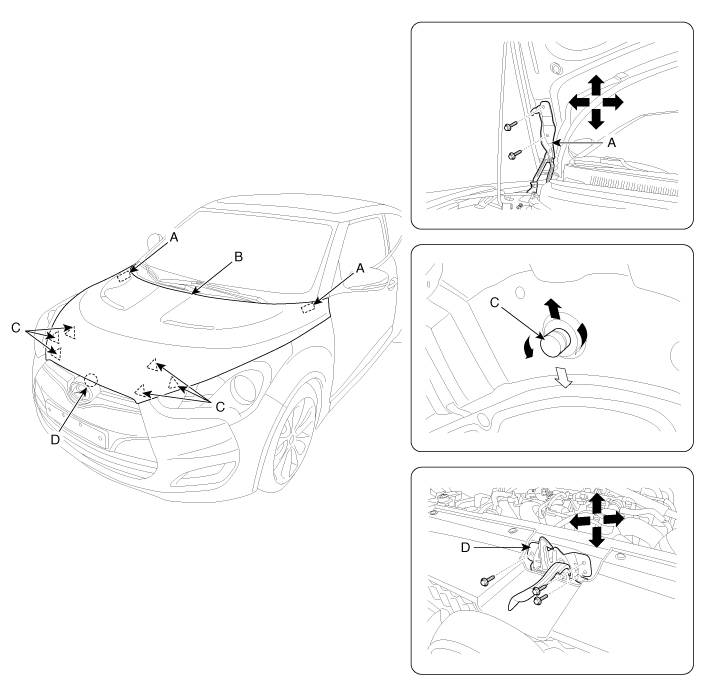
After loosening the hinge (A) mounting bolt, adjust
the hood (B) by moving it front or rear, or right or left.
|
| 2. |
Adjust the hood height by turning the hood over slam
bumpers (C).
|
| 3. |
After loosening the hood latch (D) mounting bolts
and nuts, adjust the latch by moving it up or down, or right or left.
|
 Fender. Repair procedures
Replacement
•
When removing and installing the fender,
an assistant is necessary.
...
 Tail Gate. Repair procedures
Replacement
Tail Gate Assembly Replacement
•
When removing and installing the tail gate,
...
See also:
Engine Control Module (ECM). Schematic Diagrams
Harness Connector
ECM Terminal Function
Connector [EGGM-A]
Pin No.
Description
Connected to
1
Injector (Cylinder #3) ...
Rear Washer Motor. Repair procedures
Inspection
1.
With the washer motor connected to the reservoir tank, fill the
reservoir tank with water.
...
Glove box
To open the glove box, push the button and the glove box will automatically open.
Close the glove box after use.
WARNING
To reduce the risk of injury in an accident or sudden stop, always keep t ...
Categories
- Hyundai Veloster Manuals Home
- Hyundai Veloster 2010-2017 Owner's Manual
- Hyundai Veloster 2010-2017 Service Manual
© 2011-2025 Copyright www.hvmanual.com

