
 Hyundai Veloster: Front Lower Arm. Repair procedures
Hyundai Veloster 2011-2017 Service Manual / Suspension System / Front Suspension System / Front Lower Arm. Repair procedures
Hyundai Veloster: Front Lower Arm. Repair procedures
Hyundai Veloster 2011-2017 Service Manual / Suspension System / Front Suspension System / Front Lower Arm. Repair procedures
Hyundai Veloster 2011-2017 Service Manual / Suspension System / Front Suspension System / Front Lower Arm. Repair procedures
Replacement
| 1. |
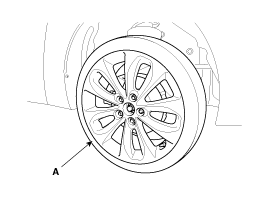
Remove the front wheel & tire.
|

| 2. |
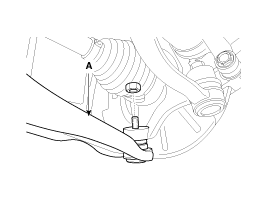
Loosen the nut and remove the lower arm (A).
|
| 3. |
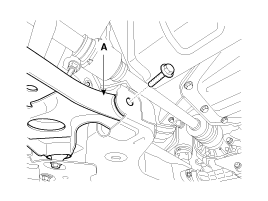
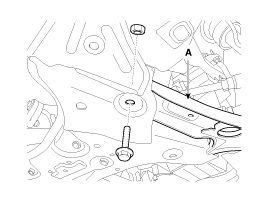
Loosen the bolts & nuts and then remove the lower arm (A) with
the sub frame.
|
| 4. |
Installation is the reverse of removal.
|
Inspection
| 1. |
Check the bushing for wear and deterioration.
|
| 2. |
Check the lower arm for deformation.
|
| 3. |
Check the all bolts and nuts.
|
 Front Strut Assembly. Repair procedures
Replacement
1.
Remove the front wheel & tire.
Tightening torque :
88.3 ~ 107.9N.m(9.0 ~ 11.0kgf.m, 65.1 ~ 79.6lb-ft)
...
 Front Stabilizer Bar. Repair procedures
Replacement
1.
Remove the front wheel & tire.
Tightening torque :
88.3 ~ 107.9N.m(9.0 ~ 11.0kgf.m, 65.1 ~ 79.6lb-ft)
...
See also:
Tailgate room lamp
The tailgate room lamp comes on when the tailgate is opened.
CAUTION
The tailgate room lamp comes on as long as the tailgate lid opens. To prevent
unnecessary charging system drain, close the ta ...
Windows
(1) Driver’s door power window switch (2) Front passenger’s door power window
switch (3) Rear door (right) power window switch* (4) Window opening and closing
(5) Automatic power window* (6) ...
Setting the tire inflation pressure
12. After driving approximately 2 miles (3 km), stop at a suitable location.
13. Connect connection hose (9) of the compressor directly to the tire valve.
14. Connect between compressor and the ve ...
Categories
- Hyundai Veloster Manuals Home
- Hyundai Veloster 2010-2017 Owner's Manual
- Hyundai Veloster 2010-2017 Service Manual

© 2011-2026 Copyright www.hvmanual.com