 Hyundai Veloster: IPM (Intelligent integrated Platform Module). Repair procedures
Hyundai Veloster 2011-2017 Service Manual / Body Electrical System / BCM (Body Control Module) / IPM (Intelligent integrated Platform Module). Repair procedures
Hyundai Veloster: IPM (Intelligent integrated Platform Module). Repair procedures
Hyundai Veloster 2011-2017 Service Manual / Body Electrical System / BCM (Body Control Module) / IPM (Intelligent integrated Platform Module). Repair procedures
Removal
| 1. |
Disconnect the negative (-) battery terminal.
|
| 2. |
Remove the crash pad lower panel. (Refer to the BD group - "Crash
pad")
|
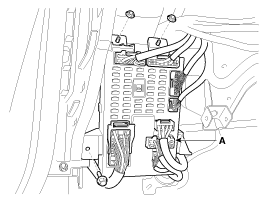
| 3. |
Disconnect the IPM connectors, loosening the nut (2EA) and the
bolt (1EA), then remove the IPM.
|
| 4. |
The installation is the reverse order of removal.
|
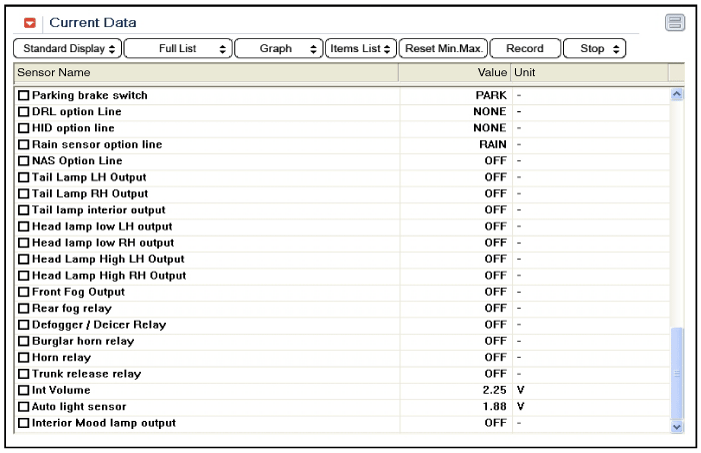
| 1. |
It will be able to diagnose defects of IPM with GDS quickly. GDS
can operates actuator manually, input/output value monitoring and self
diagnosis.
|
| 2. |
Select model and "IPM".
|
| 3. |
Select the module to check.
|
| 4. |
Select "Input/output monitoring", if you will check current data
of body network system. It provides input/output status of each module.
|
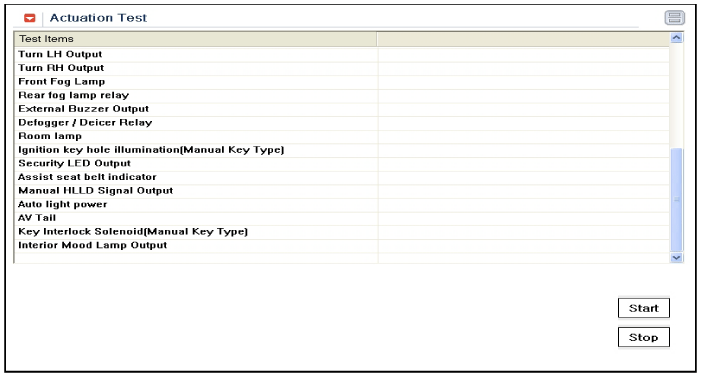
| 5. |
If you will check each module data operation manually, select
"Actuation test".
|
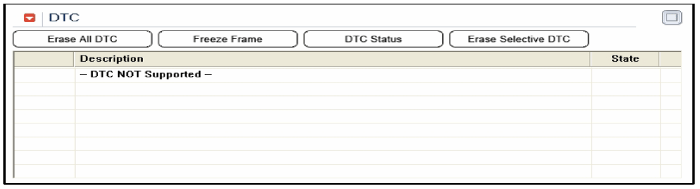
| 6. |
To check the DTC of the each module, select "DIAGNOSTIC TROUBLE
CODES".
|
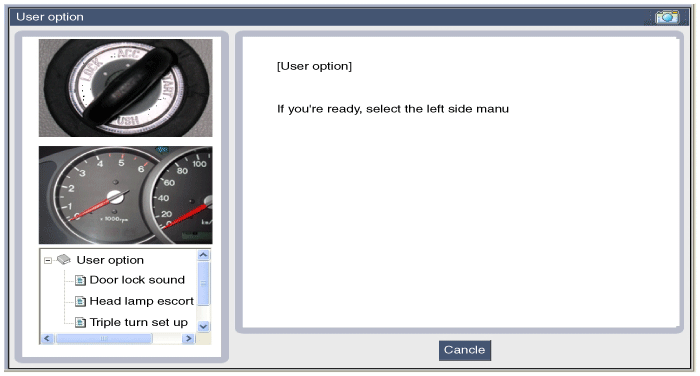
| 7. |
If you want to change user option, select “user option”.
|
 IPM (Intelligent integrated Platform Module). Description and Operation
Description
IPM Overview
The Body Control Module (IPM-Intelligent integrated Platform Module) supplies
vehicle occupants with visual and audible information and it controls various
vehic ...
 Seat Electrical
...
See also:
Automatic heating and air conditioning
The automatic climate control system is controlled by simply setting the desired
temperature.
The Full Automatic Temperature Control (FATC) system automatically controls the
heating and cooling ...
Variable Intake Solenoid (VIS) Valve. Description and Operation
Description
Variable Intake manifold Solenoid (VIS) valve is installed on the intake
manifold. The VIS valve controls the vacuum modulator which activates a valve
in the intake manifold. The ...
Wheel replacement
When replacing the metal wheels for any reason, make sure the new wheels are
equivalent to the original factory units in diameter, rim width and offset.
WARNING
A wheel that is not the correct siz ...
Categories
- Hyundai Veloster Manuals Home
- Hyundai Veloster 2010-2017 Owner's Manual
- Hyundai Veloster 2010-2017 Service Manual
