 Hyundai Veloster: SRS Control Module (SRSCM). Repair procedures
Hyundai Veloster 2011-2017 Service Manual / Restraint (Advanced) / SRSCM / SRS Control Module (SRSCM). Repair procedures
Hyundai Veloster: SRS Control Module (SRSCM). Repair procedures
Hyundai Veloster 2011-2017 Service Manual / Restraint (Advanced) / SRSCM / SRS Control Module (SRSCM). Repair procedures
Removal
| 1. |
Remove the ignition key from the vehicle.
|
| 2. |
Disconnect the battery negative cable and wait for at least three
minutes before beginning work.
|
| 3. |
Remove the floor console.
(Refer to the Body group - "Console")
|
| 4. |
Pull up the lock, of the SRSCM connector, the disconnect the connector
(A and B).
|
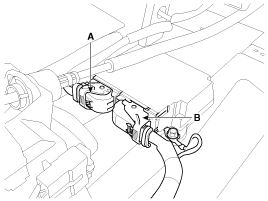
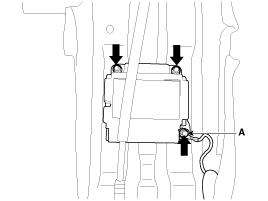
| 5. |
Remove the SRSCM mounting bolt and nuts from the SRSCM, then remove
the SRSCM.
|
Installation
| 1. |
Remove the ignition key from the vehicle.
|
| 2. |
Disconnect the battery negative cable and wait for at least three
minutes before beginning work.
|
| 3. |
Install the SRSCM with the SRSCM mounting bolt and nuts.
|
| 4. |
Connect the SRSCM harness connector.
|
| 5. |
Install the floor console.
(Refer to the Body group - "Console")
|
| 6. |
Reconnect the battery negative cable.
|
| 7. |
After installing the SRSCM, confirm proper system operation:
|
Variant coding
|
| ■ On-Line type on GDS |
| 1. |
Ignition "OFF", connect GDS.
|
| 2. |
Ignition "ON" & Engine "OFF" select vehicle name and airbag system.
|
| 3. |
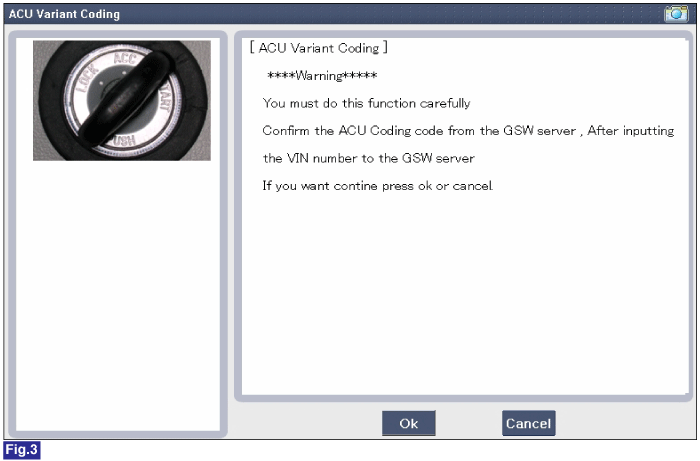
Select Variant coding mode.
|
| 4. |
Follow steps on the screen as below.
|
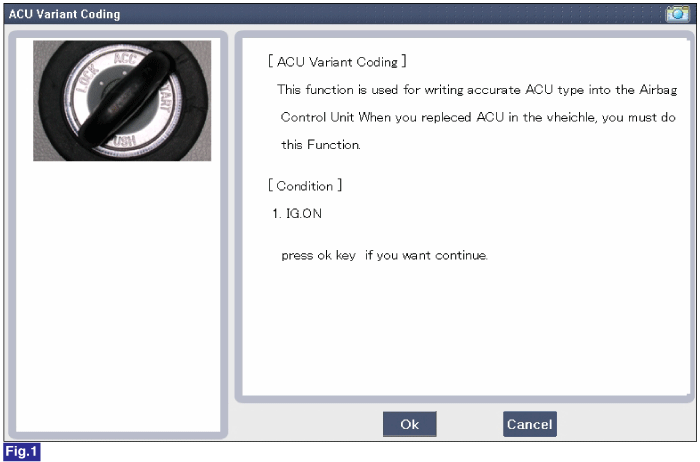
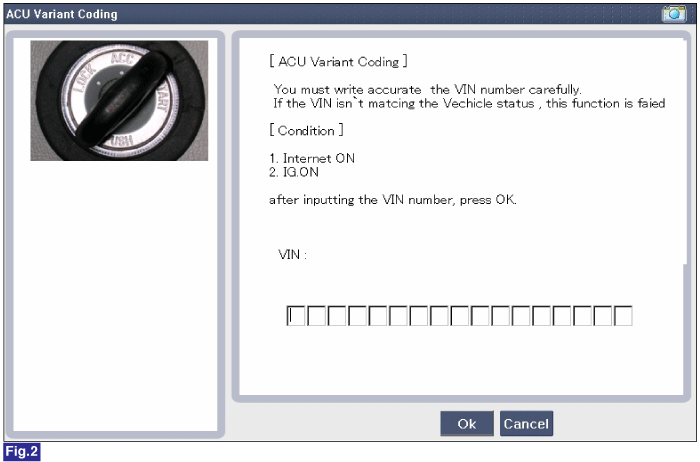


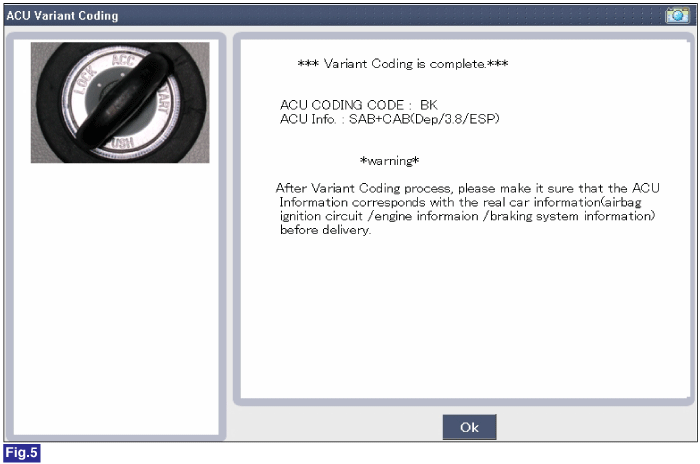
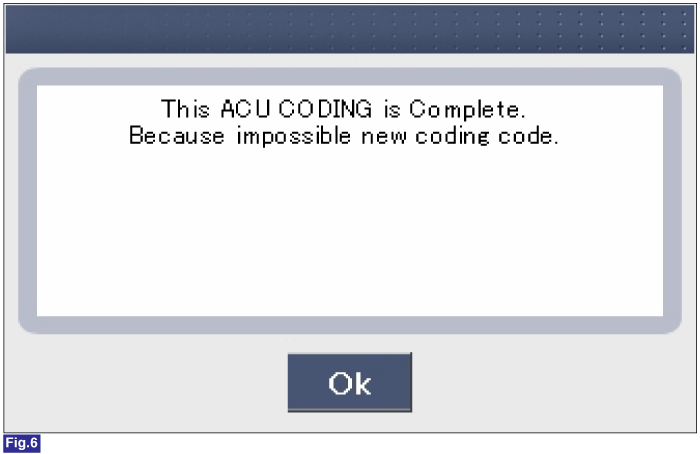
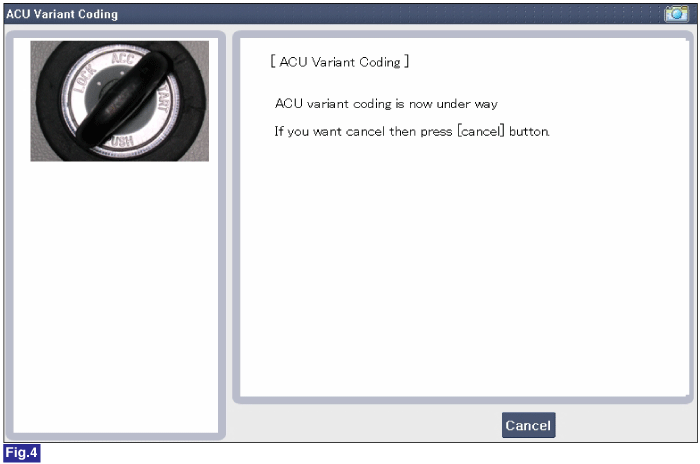
1) This screen is opened when you try the variant coding again
on the SRSCM which has bee performed variant coding.
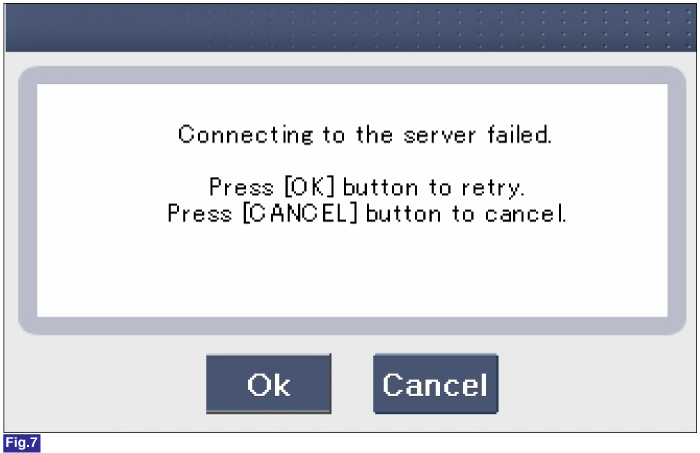
2) Screen of communication failure
|


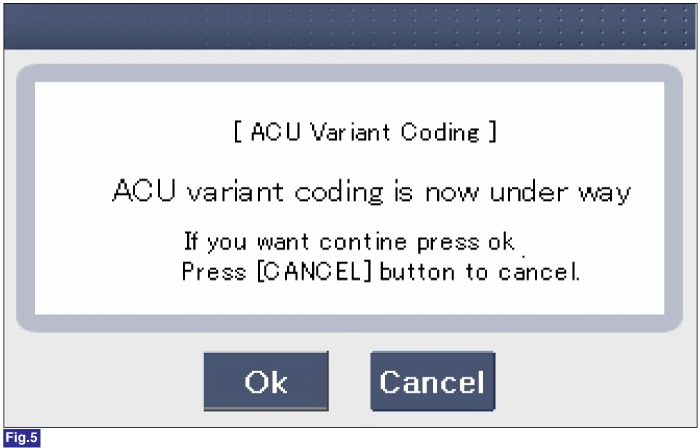

1) This screen is opened when you try the variant coding again
on the SRSCM which has bee performed variant coding.
|


 Front Impact Sensor (FIS). Description and Operation
Description
The front impact sensor (FIS) is installed in the front side member. They
are remote sensors that detect acceleration due to a collision at its mounting
location. The primary pur ...
See also:
Front Impact Sensor (FIS). Repair procedures
Removal
•
Removal of the airbag must be performed according to the
precautions/ procedures d ...
Description and Operation
Description
Emissions Control System consists of three major systems.
•
The Crankcase Emission Control System prevents blow-by gas from
releasing into the atmosphere. T ...
Relay Box (Engine Compartment). Repair procedures
Inspection
Power Relay Test (Type A)
-
Do not use pliers.
-
...
Categories
- Hyundai Veloster Manuals Home
- Hyundai Veloster 2010-2017 Owner's Manual
- Hyundai Veloster 2010-2017 Service Manual
