 Hyundai Veloster: Console. Repair procedures
Hyundai Veloster 2011-2017 Service Manual / Body (Interior and Exterior) / Interior / Console. Repair procedures
Hyundai Veloster 2011-2017 Service Manual / Body (Interior and Exterior) / Interior / Console. Repair procedures
Replacement
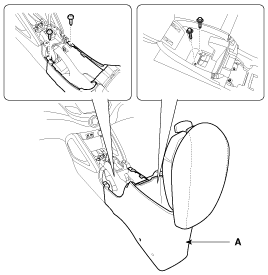
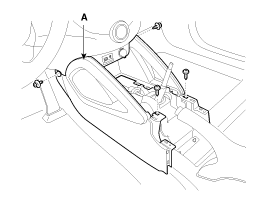
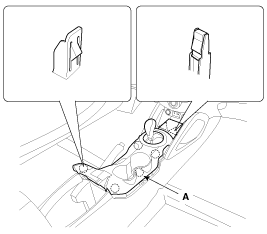
Floor Console Replacement
| [M/T] |
|
| 1. |
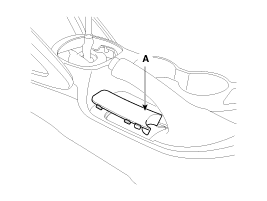
Using a screwdriver or remover, remove the parking
brake cover (A).
|
| 2. |
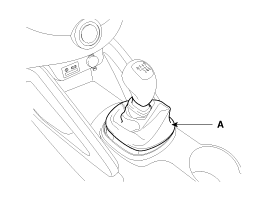
Using a screwdriver or remover, remove the gear boots
(A).
|
| 3. |
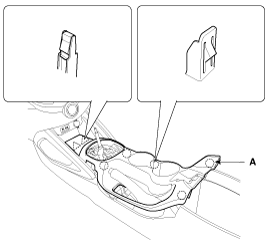
Using a screwdriver or remover, remove the console
upper cover (A).
|
| 4. |
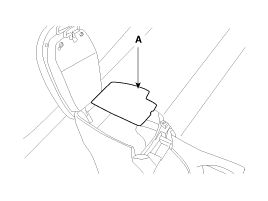
Remove the console tray mat (A).
|
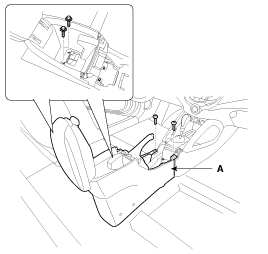
| 5. |
After loosening the mounting screws and bolts, then
remove the floor console assembly (A).
|
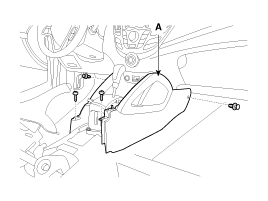
| 6. |
After loosening the mounting clips and screws, then
remove the console side cover (A).
|
| 7. |
Installation is the reverse of removal.
|
| [A/T] |
|
| 1. |
Using a screwdriver or remover, remove the parking
brake cover (A).
|
| 2. |
Using a screwdriver or remover, remove the console
upper cover (A).
|
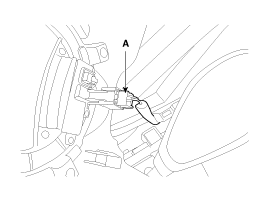
| 3. |
Disconnect the connector (A).
|
| 4. |
Remove the console tray mat (A).
|
| 5. |
After loosening the mounting screws and bolts, then
remove the floor console assembly (A).
|
| 6. |
After loosening the mounting clips and screws, then
remove the console side cover (A).
|
| 7. |
Installation is the reverse of removal.
|
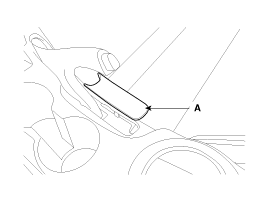
Rear Console Cover Replacement
|
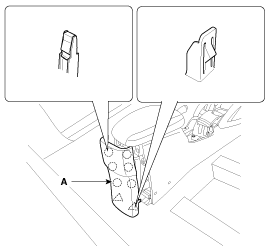
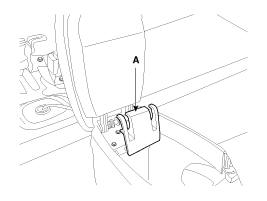
| 1. |
Using a screwdriver or remover, remove the rear console
cover (A).
|
| 2. |
Installation is the reverse of removal.
|
Armrest assembly Replacement
|
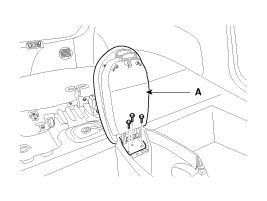
| 1. |
Using a screwdriver or remover, remove the rear console
cover (A).
|
| 2. |
After loosening the mounting screws, then remove
the armrest assembly (A).
|
| 3. |
Installation is the reverse of removal.
|
 Console. Components and Components
Location
Components
1. Floor console assembly
2. Console upper cover [M/T]
3. Console upper cover [A/T]
4. Parking brake cover
5. Ash tray assembly
6. Floor console r ...
 Crash Pad. Components and Components
Location
Components
1. Main crash pad assembly
2. Center speaker grille
3. Center speaker assembly
4. Photo sensor
5. Cluster fascia lower panel
6. Cluster fascia upper panel ...
See also:
Smart key function
1.Door lock 2.Door unlock 3.Trunk unlock 4.Panic
With a smart key, you can lock or unlock a door (and trunk) and even start the
engine without inserting the key. Refer to the following for more d ...
Components and Components Location
Components
1. Driver Airbag (DAB)
2. Steering Wheel
3. Clock Spring
4. Passenger Airbag (PAB)
5. Side Airbag (SAB)
6. Curtain Airbag (CAB)
7. Seat Belt Pretension ...
Brake Pedal. Components and Components Location
Components
1. Cowl bracket
2. Brake pedal member assembly
3. Stop lamp switch
4. Return spring
5. Brake pedal
6. Brake pedal pad
...
Categories
- Hyundai Veloster Manuals Home
- Hyundai Veloster 2010-2017 Owner's Manual
- Hyundai Veloster 2010-2017 Service Manual
© 2011-2026 Copyright www.hvmanual.com

